• Home Page
  • Categories
    • Home Decor
    • Mom-ing
    • Photography
    • Gift Guides
  • Amazon Recommendations For You
    • Instagram
    • Pinterest

Linley Diane

Mom Help for a Happy (ish) Home

Categories: Photography

Starting A Photography Business Checklist


This Post Is All About Starting A Photography Business Checklist!

If you’ve reached this page on my blog, you should have already read the first two sections of this 3 part series! If you haven’t, go ahead and read them now. I’ve linked them right in the box below!


Part 1: Photography Business Plan | How To Start

Part 2: Photography Business Name Ideas and More


So, now that you have practiced and set-up the creative and marketing side of your new photography business, you are probably wondering, how to start a photography business legally. It’s extremely important, of course!

I’d like to point out that I am not a photography lawyer and you may want to consider having one look over your final contract once you have it in place. This article will give you photography tips and ideas of what you should have in your photography contract and more!

(This post may contain affiliate links, which means I’ll receive a small commission if you purchase through my link, at no extra cost to you).


Read Below To Find Out About Starting A Photography Business Checklist!


Paying Taxes


Once you are paid money from a client, you are considered a sole proprietor and must collect/remit sales tax and file all other taxes accordingly.

Most photographers start out as a sole prop because it’s basically automatic and easy. You can just use your SSN and don’t need an EIN for that, although you can get one if you wish. You just file a Schedule C when doing your year end taxes.

(Once you are making more money, you will need to submit estimated taxes through the year. I do my local, state, and federal tax quarterly and sales tax monthly.)


I highly recommend finding an accountant to help you with this!!!


Also highly recommended is setting up a business bank account and make sure you are setting aside enough to pay taxes when they are due. You accountant can help you with how much.


Another popular choice is to become an LLC. It’s a little more involved but can be done pretty easily through a service like Legal Zoom, which is what I used.

Legal Zoom is a great resource which can also be used for things like getting an EIN, filing a DBA, etc.

To Sum Up, you will need to collect and remit sales tax according to your state laws and also pay:

  • Local Tax
  • State Tax
  • Federal Tax

Getting Licensed and Insured


There is no such thing as a special test or license to be considered a professional photographer.

But, there may be other business licenses and permits that you will need to check with you local township about. For example, you may need to complete a fire inspection in your studio or have a permit for any signage you plan to display.

You will also need to get insurance for your business. At the very least, you will want liability insurance. You may also choose to insure your equipment. A local insurance agent in your area can dive deeper and help you with exactly what you need depending on how you run your particular business. Personally, I found it easiest to go with the same insurance agent who also handles my home and auto.


Photography Business Policies and Contracts


Ok, this area is so important! Having proper contracts and policies that your clients review and sign when booking with you will save you sooo many headaches down the road! You MUST set clear expectations for your clients!

Every business will have their own way of running their business and what works best for them. Your policies should reflect that and you need to stick to them!

Psst: An incredible resource for all things photography business and legal related is The LawTog Website.


Here are some things to include in your contract/policies


Be clear on what is included. You clients should be clear on what they paying for and what they can expect from you.

  • What is included in the amount the client is paying? (Is it an all-inclusive package or a separate session fee then product purchase requirement, etc.)
  • How much money is due and when is it due?
  • How many images can the client expect to see in their final gallery?
  • Will you show any unedited images? Who will choose which ones you edit?
  • Is any travel to shoot location included in your price? (Will you charge extra for going outside of a certain mile radius from your home/business location?)
  • How long will the shoot take? (Up to 2 hours shoot time, for example)
  • Who chooses the location for the shoot?
  • Who chooses the client wardrobe? Will you provide anything?
  • How long after the shoot will it take you to deliver the final images to the client?

Expect the unexpected.

  • What happens if the clients are late or don’t show to the shoot?
  • Weather rescheduling- what happens if your outdoor shoot is scheduled and then the forecast calls for bad weather?
  • Under what circumstances, if any, will you offer a reshoot? At what cost?
  • What happens if the clients are unhappy with their photos?
  • What amount of editing will you do? (For example, if a client requests higher levels of editing such as head-swaps? Will you charge extra for this?)
  • What if the client’s event is cancelled? (Especially important for wedding photographers!)
  • What if you or the client is sick on shoot day? (Again, very important for wedding photographers!)
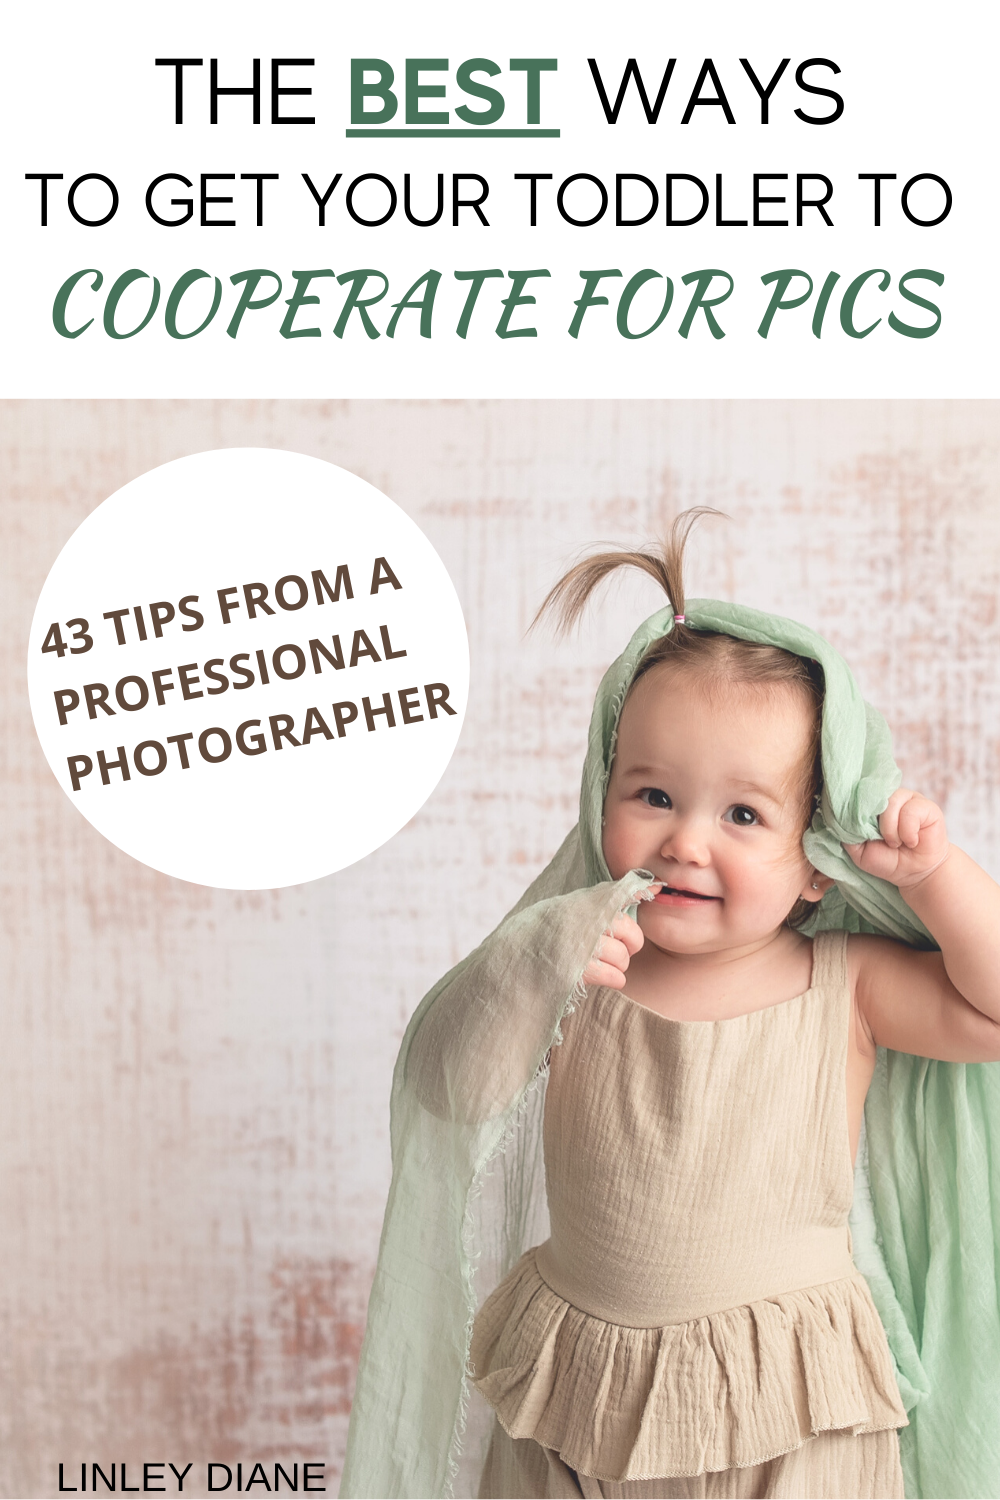
  • What happens if the clients are totally uncooperative? (This happens a lot when shooting toddlers!)

Other Considerations.

Include a model release in your contract. This will allow you to use client images on your website/blog/social pages/marketing materials, etc.

Clients should also understand that as the photographer, you own the images. You may sell a print release to them but you hold the copyright.

(Personally, if a client does not want to sign the model release, I certainly would not enforce that! It rarely happens but I always respect their request for online privacy if they ask.)

You may find some other things to include as you get further along in your business. Put your policies in written form and have clients sign off on it when paying their initial deposit.


This Post Was All About Starting A Photography Business Checklist!


You May Also Be Interested In:

Photography Business Plan Part ONE!

New Business Owner & Boss Lady Must Haves!

Toddler Pictures – How to Get Them To Cooperate!


Share this:

  • Twitter
  • Facebook
  • Pinterest
Categories: Photography

Photography Business Name Ideas And More

This Post Is All About The Creative Side Of Your Photography Business! Photography Business Name Ideas and More!

Hello again! Hopefully you are here because you have read the first part of this series: The Very Basic First Steps to Creating Your Photography Business!

If you haven’t read that yet, you can go back and check it out here!

This post will focus on the creative / marketing logistics of owning a photography business. I promise it’s a lot more than you probably thought but also a fun part of the process! The creative side of things will come easier than the business side (which we will cover in the next post!) to most photographers!

(This post may contain affiliate links, which means I’ll receive a small commission if you purchase through my link, at no extra cost to you).


Name Your Business


For some people, this will come naturally and easily! Other people will have a hard time coming up with a name for their photography business. Here is a list of things to consider when coming up with some photography business name ideas:


Things to consider when choosing your photography business name:


  • Pick something that is easy to spell and remember. You want people spreading the word about your business through word of mouth. If it’s hard to spell or difficult to pronounce, this will hurt you immensely.
  • Make sure it’s not taken. This includes the available social handles. Check Google, Facebook, Instagram, Twitter, and any other social channels to see if the name/handle is available. Ideally, you want everything the exact same! Also, make sure it’s not already trademarked. This site can help with that: https://www.uspto.gov/
  • It should go with your business niche. For example, if you are shooting weddings, you don’t want to call your business something like: “balloons and bears photography” as this indicates that you’d shoot kids.
  • Also, if it makes sense, putting the actual niche of your business in the name can help in Google Rankings. For example, I should have called my business Anne Wilmus Newborn Photography, rather than just Anne Wilmus Photography.
  • That said, if you aren’t completely sure of your niche just yet, pick something that is a little more versatile and can grow with you and your audience if you decide to change directions in the future.

You can use your own name. For example, my business is simply called Anne Wilmus Photography. Since I used my own name, I didn’t have to file a DBA (Doing Business As).

You can use Legal Zoom to file your DBA.


But before you decide to do this, consider a few things first.

  • Is your name common? If so, it may already be taken as a business name.
  • Is there any chance you would ever change your name? Either via marriage or divorce.
  • Is your name hard to spell? If so, I suggest not using it as it will be hard for people to find when googling.

Pick Your Brand Aesthetic


What will you photography aesthetic convey? Do you want it to be light and airy, dark and moody, vintage inspired, etc?

  • Pick the colors you want to use for your website and marketing materials. What appeals to you and what type of clients do you want to draw in? (Pinterest is a wealth of information on colors that work well together).
  • Pick fonts. You should pick ones that are easy to read and stick to two or three of them across your marketing platforms. Again, Pinterest has excellent ideas for font combos.
  • Have a logo designed. (This costs just about $10 on Etsy!)
  • Pick a website theme and customize it so that it matches all of the above. (Again, Etsy has some inexpensive choices of themes you can customize)

    When choosing your colors/logos/fonts, and overall style, be consistent across all marketing platforms and materials. Your brand should be easily recognizable!

Pro Tip! Client wardrobe is also part of the brand aesthetic. Consider how you will handle this to create the type of images you desire and that will attract the clients you want. Will you provide wardrobe? Refer them to a stylist? Provide recommendations?


Create Marketing Materials


You can create these yourself using tools such as Photoshop or Canva, buy a template from Etsy and then customize it, or hire someone to make them from scratch.

(Personally, I found that the cheapest and easiest method was to buy templates on Etsy and then customize in Photoshop.)

I recommend having the following:

  • A Business Card
  • A Digital Welcome Magazine (or at least a price sheet)
  • A Product Catalog

Final Considerations


You may now be thinking of upgrading your gear. Here are my recommendations on top lenses to take your photography to the next level!

(Brand will depend on your camera body* but these are the focal lengths that are both sharp and versatile. I own all of them. You can buy on Adorama, B&H, or Amazon.)

*Cool tip! I just found this amazing tool on Amazon so you can check lens compatibility with your camera body!


50mm – literally the best lens ever- so sharp and so inexpensive for a prime lens! (It’s also an Amazon Choice winner with over 6,000 5 Star Ratings!)
35mm
85mm
27-70
70-200
105mm Macro

You may also be ready to upgrade to a Full Frame (FX) camera. ( The one I linked is an amazing camera at a great price for Nikon users.)

And finally, another great and inexpensive purchase is a reflector. I linked the exact one I have. Purchased back in 2012 and used hundreds of times since!


In the next post, I will go over how to build the legal/business side of your business! Click here to read it!


This Post Was All About The Creative Side Of Your Photography Business! Photography Business Name Ideas and More!


You May Also Be Interested In:

Photography Business Plan Part ONE!

New Business Owner & Boss Lady Must Haves!

Toddler Pictures – How to Get Them To Cooperate!


Share this:

  • Twitter
  • Facebook
  • Pinterest
Categories: Photography

Photography Business Plan | How To Start

If you want to be a professional photographer, you need a photography business plan. Even if it’s just a loose one, there are many things to consider from the creative to legal and everything in between.

This post will focus on the very basics of getting started. In my next posts, we will get into the creative / marketing and legal logistics of owning a photography business.

I’m happy to share my knowledge as a 10+ year photography business owner who quickly grew my niche newborn photography business to a 6 figure a year business while shooting just 2 days a week!

(This post may contain affiliate links, which means I’ll receive a small commission if you purchase through my link, at no extra cost to you).


This Post Is All About A Photography Business Plan! Part 1


The Very First Steps To Take:


Get a basic mirrorless or DSLR camera!


This is simple. If you are going to be a professional photographer who actually makes a profit with your business you need a camera with manual shooting capabilities. Buying things is fun and easy right?!

Now, that said, I would NOT start with an expensive one.

You will need a DSLR or mirrorless camera (no cell phone or point and shoot).

Get a simple one that you can learn and practice on. You can often find great sales on these around Black Friday. Below are my recommendations on what to try first. Just pick one of these, it’s just for practicing and learning. You can (and will want to) re-sell it later when you are ready to upgrade.

(I’ve linked ones that come as kits. Just be careful when buying that the camera you pick comes with at least one lens and a memory card (or buy that separately). Something that many people don’t realize is that camera’s are often sold as body-only. Basically that means there is no lens and you won’t be able to even take a pic. So pay close attention to the descriptions of what exactly you are buying!)


You can purchase these on Amazon or speciality camera stores B&H Photo or Adorama.

(There are also camera and lens rental stores if you want to try something before making a commitment.)


DSLR Options


Nikon D3500


Canon Rebel


Mirrorless Option

FUJI XT200


Your first camera certainly doesn’t have to be one of these three. I linked these ones because they have great reviews and features for photographers who are just starting out. So many people love the Canon Rebel to learn with! Personally, I shoot Nikon; currently a D810. I’ve tried a Fuji mirrorless but couldn’t get used to it. A lot of pros are going mirrorless though!


Next, you need to start learning and shooting!

Start with a wide variety. What I mean by this is that you want to try shooting lots of different genres of photography to find what you actually like best. It may be different than what you think!

For example, I started shooting weddings and engagements and quickly found that I just really didn’t like it, even though they were highly profitable.

Some genres to try and practice with:

  • Pets and Animals
  • Families
  • Kids
  • Babies
  • Maternity
  • Couples/Engagements
  • Weddings
  • Landscape
  • Macro
  • Real Estate
  • Product Photography/Branding

Third step: study, practice, and learn!

Along with the operation of your particular camera, one of the main things you will want to learn first is called the exposure triangle. That is the combination of shutter speed, aperture, and ISO to get the proper exposure in your camera.

This is hard until it isn’t. Read some articles, watch some you tube videos, and practice. One day, it will suddenly click and you will have amazing control over your images as you can now shoot in manual mode!

As you practice, make sure you also learn about the rules of composition and lighting. (Learning lighting techniques is honestly never quite done and always fun to get creative with!)


Time To Niche Down!


After you’ve practiced a lot, know the exposure triangle, can shoot fairly well in different lighting conditions, and can operate your camera with ease, you can niche down and get the actual BUSINESS part of this journey started!

With all the practicing you’ve been doing, you should now have a good idea of what you loved a lot and what you didn’t like at all. So, now that you know what and who you like to shoot, and you’ve gotten good at it, you can start to tailor your business!


Get A Mentor…or not.

Sometimes, you really need someone to shadow someone before starting to charge your own clients. This is especially true for wedding photographers! Volunteer to second or third shoot for a wedding photographer(s) in your area so you can learn what an actual wedding day is like and whats expected from the hired photographer.

In my opinion, weddings have the most pressure (because you have one chance to get everything right. You can’t recreate true emotional moments or re-do a first kiss!) So, if weddings are your goal, DO NOT accept a contract without shooting with someone else first. As a second or third shooter, you have much less pressure on you and can take the opportunity to learn the challenges of shooting a full wedding day!


You can also continue to practice with friends and family.

Now, if you found out that you love landscape photography, you may not NEED to mentor with someone for this. It would be beneficial though!

Same with kids, families, pets etc. Practice with people you know first! Don’t charge them while you are just practicing (aka portfolio building) and make sure they know that this is just for you and to not expect any specific images!

That said, while you are doing this for yourself, if you DO get any great images, you should give them to the people you shot as a thank you for their time and participation.

(This is basically a model call but with people you already know.)

*Important! Make sure they allow you to use the images on social media and online when doing any type of shoot like this. Get it in writing. More on this in a future post.


Other Ways To Keep Learning Once You Know Your Niche:

  • Watch You Tube Videos
  • Join Facebook Groups
  • Purchase Online Webinars and Classes
  • Take An In-Person Workshop
  • Just keep practicing and doing model calls!

PS: A BIG part of learning will be finding your editing style and, of course, learning how to do it consistently! The main tools you will use for this are Adobe Lightroom and Adobe Photoshop. They are subscription based for $9.99/month and you can do a free trial first.

(Pictured below, you want the the first plan- called Photography)


You will NEED these tools to do well with your photography business. But, there is simply too much to go over about them in this blog post, so we will save editing topics for future posts. Just know that you will want to get familiar with these programs as you are practicing.


In the next post, I go over how to build the creative/marketing side of your business!


This Post Was All About A Photography Business Plan! Part 1


You May Also Be Interested In:

New Business Owner & Boss Lady Must Haves!

Toddler Pictures – How to Get Them To Cooperate!

Choosing the Right Photographer For Photos You Will Love!


Share this:

  • Twitter
  • Facebook
  • Pinterest
Categories: Mom-ing, Photography

Toddler Pictures : The Ultimate Guide To Get Them To Cooperate

This Post Is All About Toddler Pictures: The Ultimate Guide To Get Them To Cooperate


Taking toddler pictures suck! I’m a mom of three and a professional baby photographer and I can confidently say that the ages of 1 to 3 are by far the hardest to photograph.

Kids are so unpredictable at this age! But they are also the absolute cutest and most hilarious little people! So, we have to make a solid effort to capture this stage forever.

It’s not easy but you will be glad you did it! Or paid someone else to do it, haha.

In my ten years of experience, I have researched and also stumbled upon what works best when trying to get a toddler to happily cooperate for pictures!

Read below for exactly what to do!

(This post may contain affiliate links, which means I’ll receive a small commission if you purchase through my link, at no extra cost to you).


USE PROPS


I have used all of these items in multiple shoots over the years! You often need something to keep a young child in one place, whether it’s an actual container or a cute toy to play with.

toddler photoshoot how to

Wooden Blocks


Toddler photoshoot Christmas


Trike

Even fussy kids usually perk right up when you give them a little bike to climb on!


toddler photoshoot ideas


Wagon

Kids love being in a wagon and it’s a good way to incorporate older siblings (who can pull and push it!) It can become a fun game to play during the shoot!


Old Crate or Stool

This one is soooo versatile and can be used for nearly every shoot you do, not just toddlers!

  • You can stand on it to get above your subject when needed
  • Put a todder IN a crate when they won’t sit still
  • Use it for a “just-starting-to-stand” toddler to lean on (make sure to put something weighted inside so it doesn’t tip over)
  • Sit toddlers and older kids on top for both single and group shots
  • Shorter kids can stand on it when you need height in the pic


Ladder

(buy new and distress yourself or buy an authentic old one from Etsy)


Cradle/ Tiny Bed

(I actually cannot believe how inexpensive this one is!)


Wooden Highchair

Perfect for keeping a runner in place! And good for cake smashes if you do them!


Wooden Cars

Kids forget you are taking their pic and just start to play!


Vintage or wooden rattle

This is great because you can shake it to get their attention and then let them have it (because they WILL want it) and it’s cute for a pic!


Antique stroller

Isn’t this sooo cute?! I scored this one for $10 at a local flea market!


WHERE TO GET CUTE THINGS


One of a kind, unique, and antique are best! Here are the best places to find props:


Etsy – this one is the best!
Ebay
Amazon
Facebook Marketplace
Flea Markets
Garage Sales
Estate Sales
Antique Stores
Thrift Shops


USE NOISE


If a child is sitting still but not happy or looking at you, try making some noise or giving them something to look at with these items:

  • Bells
  • Music
  • Bubbles
  • Scarf


PLAY GAMES AND GIVE PROMPTS


If the kids you are working with are a bit older, try some games and prompts to get them to act more natural as opposed to standing there and rigidly smiling.

  • Peek a boo
  • Head, shoulders, knees, and toes
  • Red light green light
  • Simon Says
  • Ring around the rosie
  • Squish Daddy
  • Sneak up on Daddy
  • Tell a secret
  • Twirl around
  • Dance and freeze
  • Scary, mad, surprised faces
  • Tell them a joke
  • Sing a song


OTHER ADVICE


  • Bring snacks that aren’t sloppy. (Cheerios, smarties, fruit snacks)
  • Do pics at a time of day when the child is usually the happiest.
  • Show them their picture and let them take one of you
  • Bribe them
  • Take a break
  • Prep everything ahead of time
  • BE FLEXIBLE!!!

There is no one more full of false hope than a first time mom at a 2 year old’s photoshoot!


Seriously, do not go into a shoot with a concrete idea of how it’s going to go. Toddlers don’t listen and can’t be reasoned with! It’s like they can sense that you really want something to happen and then make it their job to do the exact opposite.


This Post Was All About Toddler Pictures: The Ultimate Guide To Get Them To Cooperate


You May Also Be Interested In:

HOW TO TAKE YOUR OWN BABY PHOTOS AT HOME


HOW TO GET FAMILY PHOTOS YOU WILL LOVE

BE PREPARED! EVERYTHING YOU NEED TO BRING TO YOUR FAMILY PHOTOSHOOT

Share this:

  • Twitter
  • Facebook
  • Pinterest
Categories: Mom-ing, Photography

How To Take Your Own Baby Photos At Home


This post is all about How To Take Your Own Baby Photos At Home!


As a professional newborn photographer of over 10 years now, I have loads of experience photographing babies in my studio. I’ve worked with around 1,000 newborns over the years!

(You can see more of my work over on www.annewilmusphotography.com, which is also where I originally posted this article.)


Now, I love what I do, and there is no replacement for posed newborn photos in a studio. For safety reasons, you need an experienced professional for that!

But sometimes, that’s just not in the cards. Whether it be for budget reasons, health concerns, or even personal preference.

This quick guide will help you with the basics of how to take your own baby photos at home!

(This post may contain affiliate links, which means I’ll receive a small commission if you purchase through my link, at no extra cost to you).


1. Pick a well lit area for your photos. Lucky for us, babies are super portable! So, when possible, pick your little one up and move them over next to a window before you take that photo! A grainy photo in a dark area just isn’t going to do your little one justice!

Pro Tip: An inexpensive reflector like this one, will really help to add some light on baby’s face. You’ll find yourself using it a lot as you take more and more pics!

THIS IS THE EXACT ONE I HAVE:

Tips for taking your own baby photos

2. Make sure the exposure and focus are spot on. I-phones make this incredibly easy by just touching the screen. You can adjust these things in a second with the slide of your finger, so you should be pretty well set if you just take that moment to check the focus square. (Filters are great to enhance and fix minor things, but it’s always best to have a good photo from the start. Remember, you want to capture the natural beauty of your new baby, you don’t want to have to use a retro filter that will unnecessarily date the photo.)

Pro Tip: An I-phone is great, but if you are ready to up your game, try a starter DSLR or mirrorless camera for way more control over how your photos will look!

For starters, I recommend one of the following basic models (the mirrorless is weighs less and seems to be where the major development of professional cameras are headed). These models are basic and you can always trade them in and upgrade later if you find that you really love using a certain type of camera and want to invest in your future family moments.:

pics at home with new baby

3. Related to the first point, position the baby so the light from the window (or whatever your light source may be) is NOT pointing up their nose. You know how when telling a ghost story, a kid will shine their flashlight up their face and it looks super bad and creepy? Ya. Don’t do that to your baby! And while you’re at it, don’t point the camera angle up their nose either.

lifestyle photos taking your own baby pics

4. Get in a photo with your kids! You won’t regret it, I promise.

tips for iphone photos at home with new baby

Pro Tip: You can use a timer and tripod to accomplish this!


5. In this season of life, with your baby changing so quickly, any photo is better than no photo! So while all of the above are great tips, don’t let anything stop you from taking a photo anyway. If you can’t find the perfect spot of light or simply don’t want to move from the comfy spot on the couch, go ahead and snap that photo anyway. Not every photo has to be worthy of posting and sharing online. You can keep some just for you and your own memories. You really can never have too many photos of your baby!

tips for baby photos yourself

Related: The top (Inexpensive!) products I use in my newborn studio for happy, sleepy babies!


This post was all about How To Take Your Own Baby Photos At Home!


You May Also Be Interested In:

HOW TO DISPLAY YOUR FAMILY PHOTOS


WHAT TO WEAR FOR FAMILY PHOTOS IN THE FALL


WHAT TO WEAR FOR CHRISTMAS PHOTOS


Share this:

  • Twitter
  • Facebook
  • Pinterest
  • 1
  • 2
  • 3
  • Next Page »
  • Instagram
  • Pinterest

Pinterest

Copyright © 2025 · Theme by Blog Pixie